Well I Tried...
I decided to build a glass table, and it’s harder than I thought.
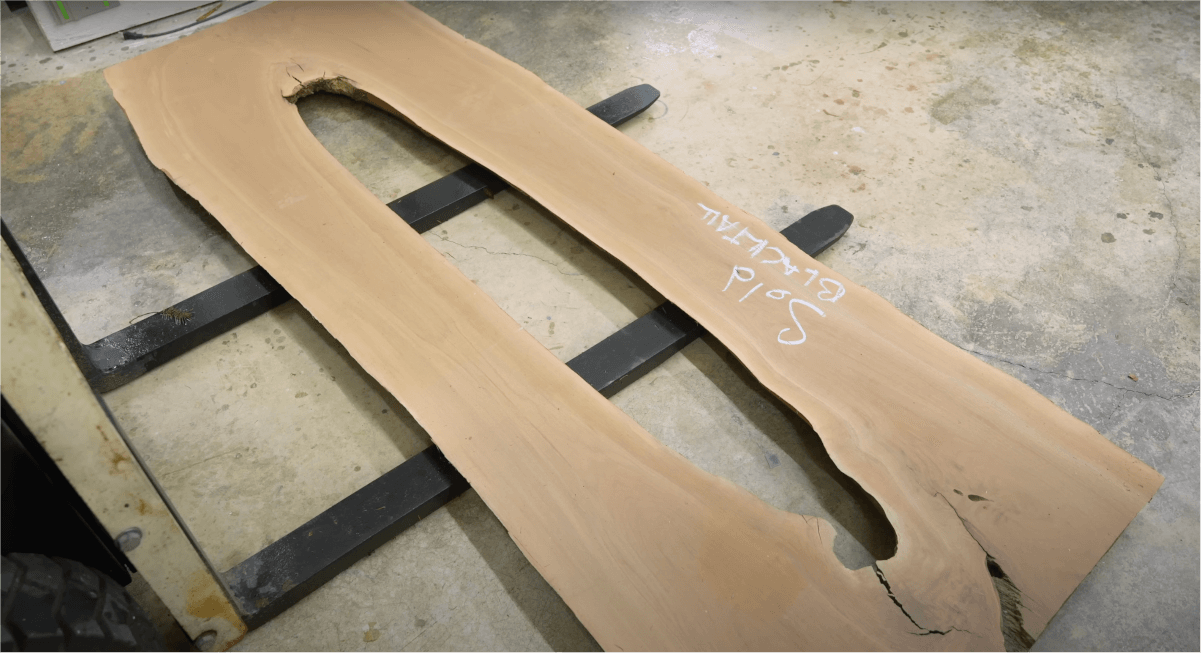
About four years ago, I saw one of the most unique pieces of wood that I've ever seen. It was this piece of Oregon Black Walnut. And what makes this piece so unique is the absolutely perfect void in the center.
I've worked with lots of pieces of wood with voids in the past, but they're almost always just riddled with rot, which is why I fill them with epoxy.
This one, however, was flawless.
It was where the tree just kind of grew around itself, and left a perfectly stable, perfectly intact void running down the length of it.
I didn’t actually know exactly what I wanted to do with it, so I just sat on it for the last four years; it cost about $800…but finally, inspiration hit - make a glass table.
Unfortunately, I have a fear of glass… I always feel like it's going to explode or something.
And after some research, I realized that this fear was not completely unfounded, but I did learned a few things that gave me the confidence to move forward.
So spending a whopping $11 on a glass cutting kit from Amazon, I got started… and after a few mistakes (fear realized), I thought it was a good idea to regroup and learn a little bit more about glass cutting before continuing with the project.
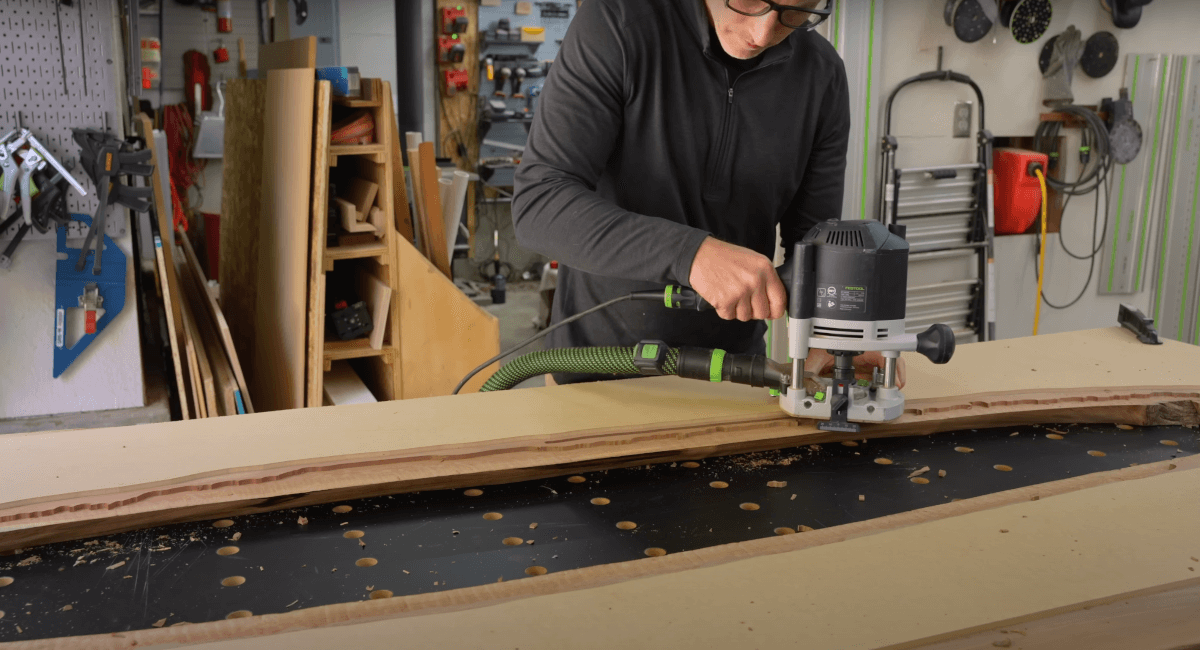
Since I obviously wasn't quite ready to cut the glass for the table top, I decided to get started on the base.
For the base, I wanted a design that was fairly unique and not something I've seen a hundred times before, but also not something super wild and distracting from the overall design of the table.
I came up with this, and Scott (my camera guy) made a really nice rendering for me, and I feel like this is a nice step in the right direction of keeping it unique, but not too over the top.


As a side note: If you've been hobby woodworking for a little while, and you accidentally found yourself getting kind of good, and you want to take that next step, and try some fine furniture building. One of the best pieces of advice I can offer you is to create and use templates like the one I'm using here to build the base.
During the time that I was building this table base, I was doing a lot of research on… 1 - How was I actually going to cut the glass for the tabletop? And 2 - How was I going to inlay it once I had it?
There are a lot of videos on YouTube where people build glass and wood tables, but every one that I saw, people just slap the glass down, traced it out, and then eyeballed the inlay with a router… and no offense to any of those people, but that seems like a terrible way to do an inlay. Actually, I take that back… offense intended. That is a terrible way to do an inlay.
I wanted to find a way to get a perfect seam while still allowing for wood movement. So I came up with this very simple method that I very clearly articulate here.
Now, if you actually watched that clip above, it was simply nonsensical rambling... because the whole process is a bit confusing.
So, to make it easier for you, and if you did actually want to make one of these wood and glass tables yourself, inlay and all, I created a free download for you that shares the entire process.

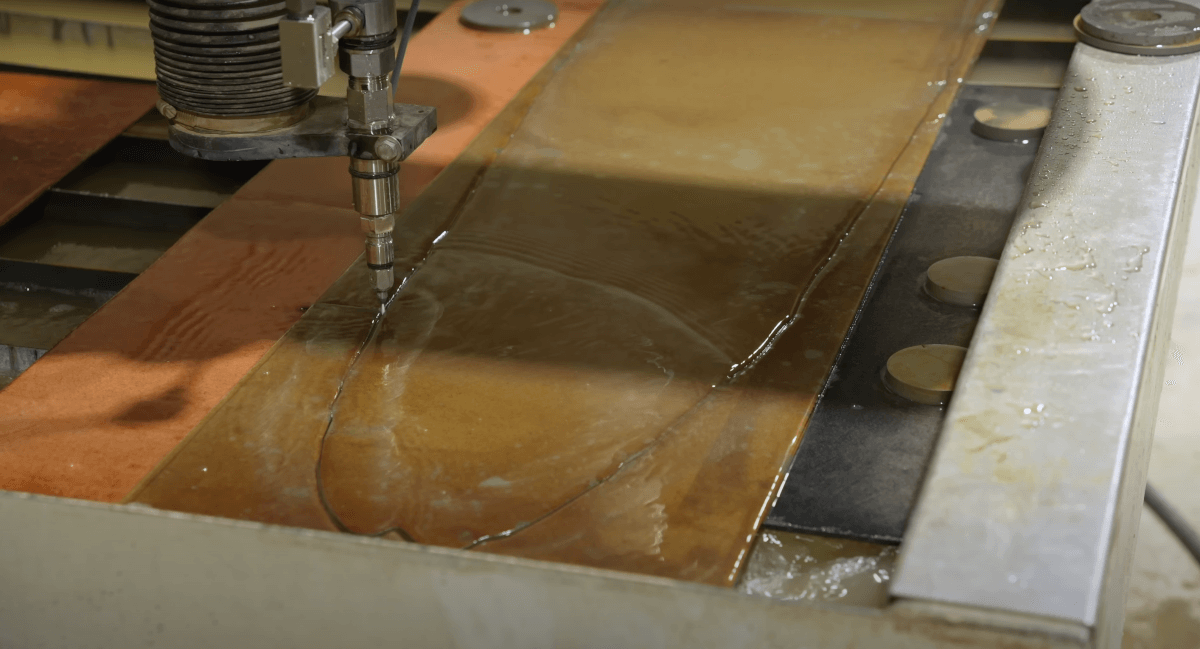
I don't mean to brag, but after all my research, I did become a bit of an expert on glass cutting.
And as it turns out, the best way to cut a complex shape out of glass, is just like a lot of things… have a professional do it; go figure.
So I went up to Portland Waterjet.
I brought them the template that I made, and they turned that into a digital file to cut out the glass. And it was pretty cool. Not just because of how accurate and how fast it was, but also, if this glass ever breaks, I have the file and they can just cut out another one from it, and i'll have the perfect replacement.
Maybe someday I'll get the chops to try hand-cutting glass, but for now, I'm really happy that I went the waterjet route.
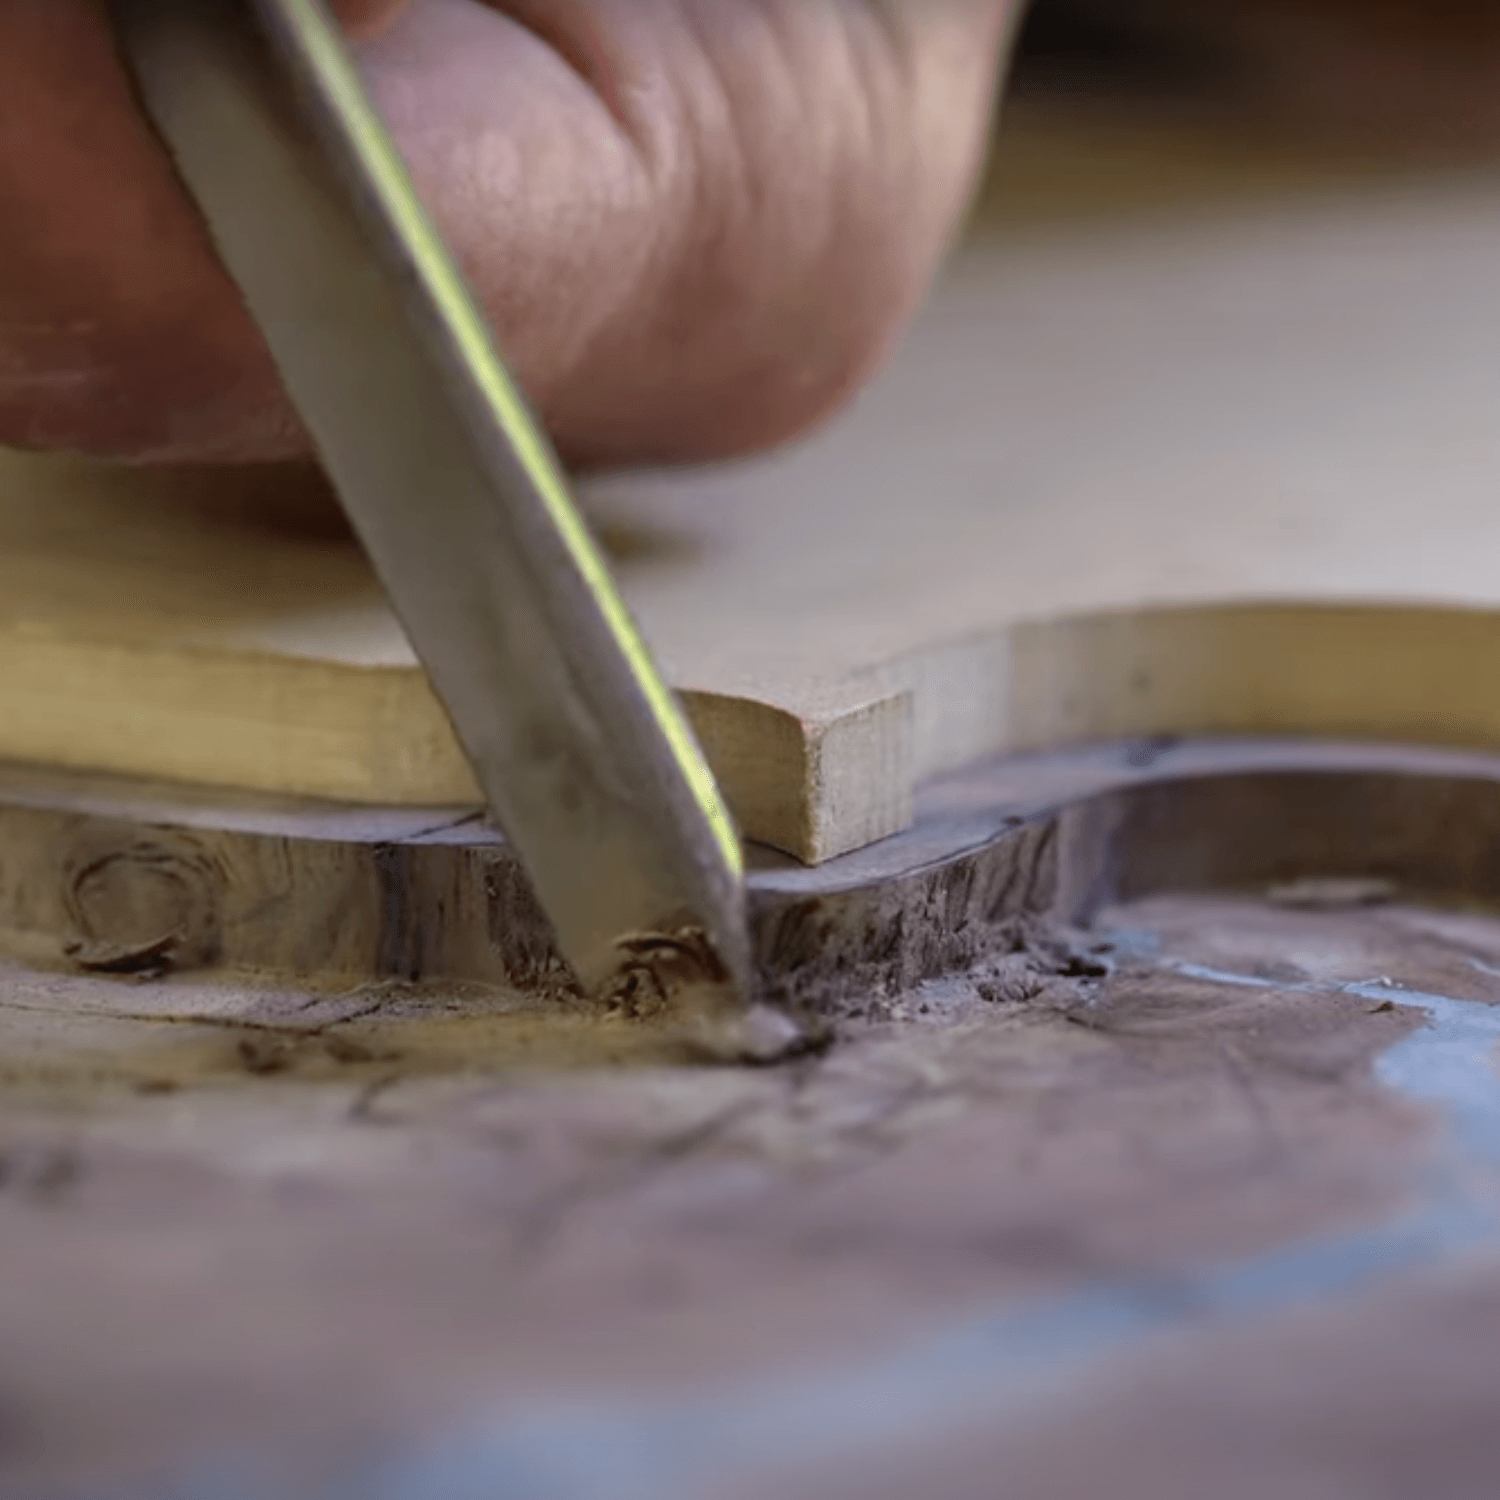
With the glass drama behind me, and back in the shop, it was time to cut out the negative to make the inlay for the glass table top.

Once the negative is clamped down, you can't mess it up. All I have to do is just hog out all the material.

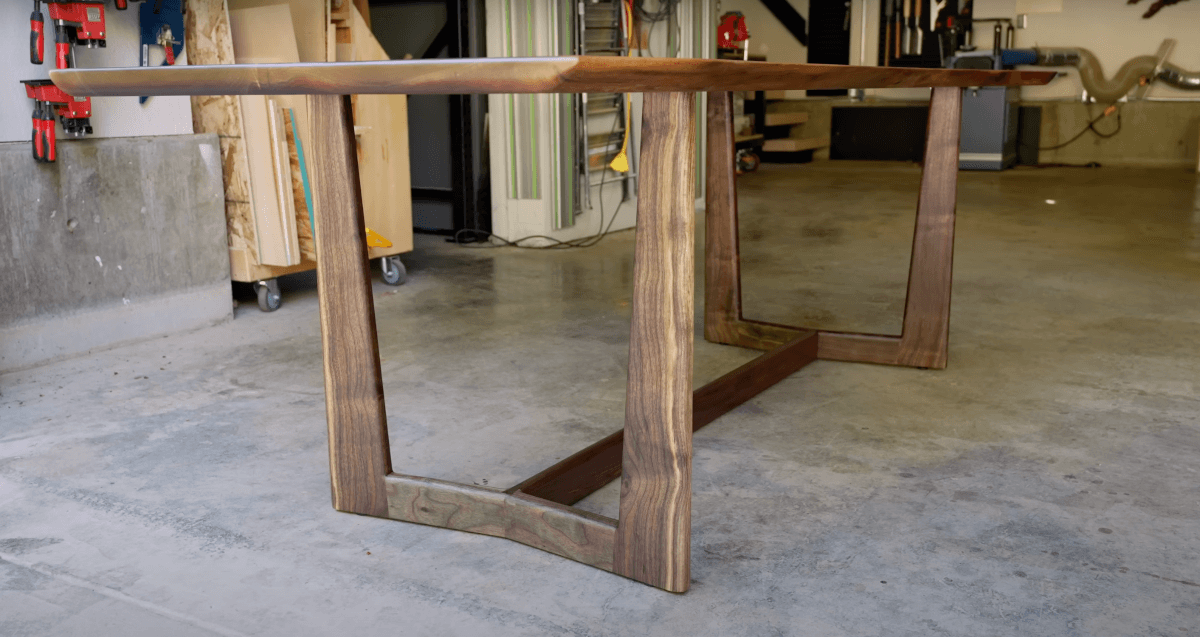
With the inlay now finished, it seem like the table top was kind of missing something. It definitely looks cool with the glass, but I wanted to make it a bit more interesting.
I decided to add contrasting bow ties.
As it turns out, this was probably the most difficult inlay that I've ever done, because for some reason, I decided to really challenge myself and make these bow ties come to the most ridiculously fine point in the middle.
… and if you're wondering, yes, I have broken a bow tie before (on installation) by hammering them in too hard. And yeah, it's pretty freaking depressing. It's probably like dropping your phone into a public toilet where you just stand there staring at what you just did in disbelief, knowing that you have to proceed, but not entirely sure how to proceed. But eventually just roll your sleeves up and do what needs to be done.

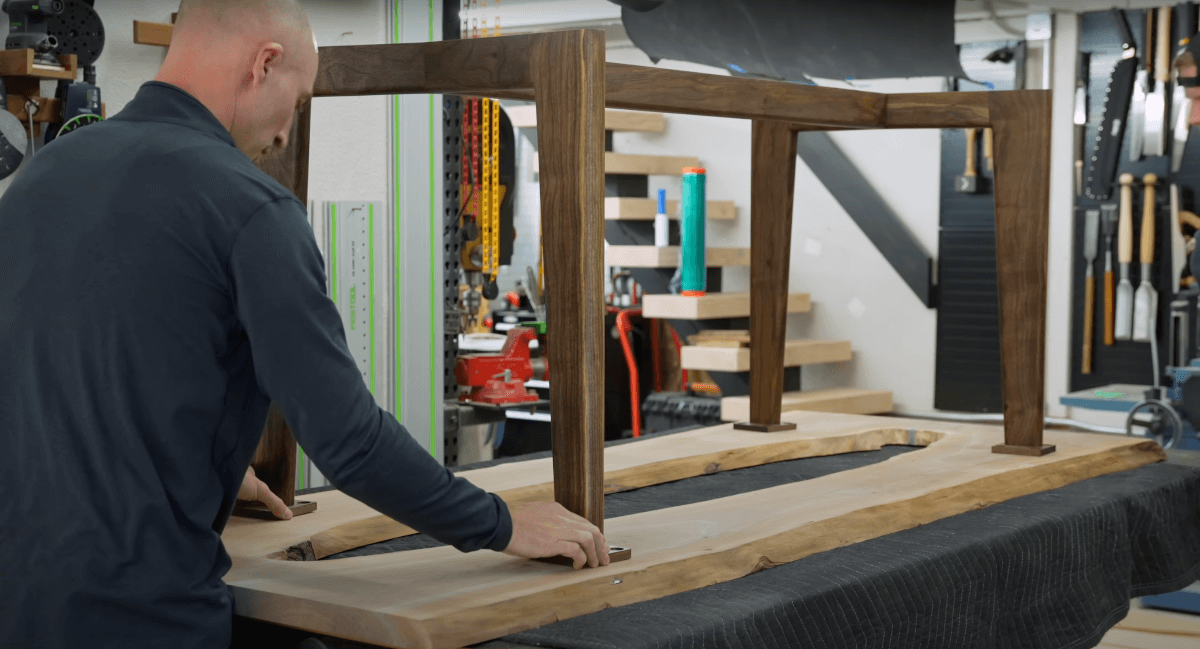
With the bow tie and table top finished, I turned my attention back to completing the base.
My main motivation for the design of the base was that I didn't want anything to obscure that really cool natural void in the center, because obviously the glass was going to be the highlight of this table.
So for the mounting system, I made a slightly oversized template, and I wasn't even hyper critical about the size because I wanted there to be a little bit of wiggle room to allow me to adjust the base when mounting it to the table; it worked pretty well.
I am a big fan of how the base came together. Sometimes the visions in my head don't always match reality, but having the rendering from Scott really helped with this one.


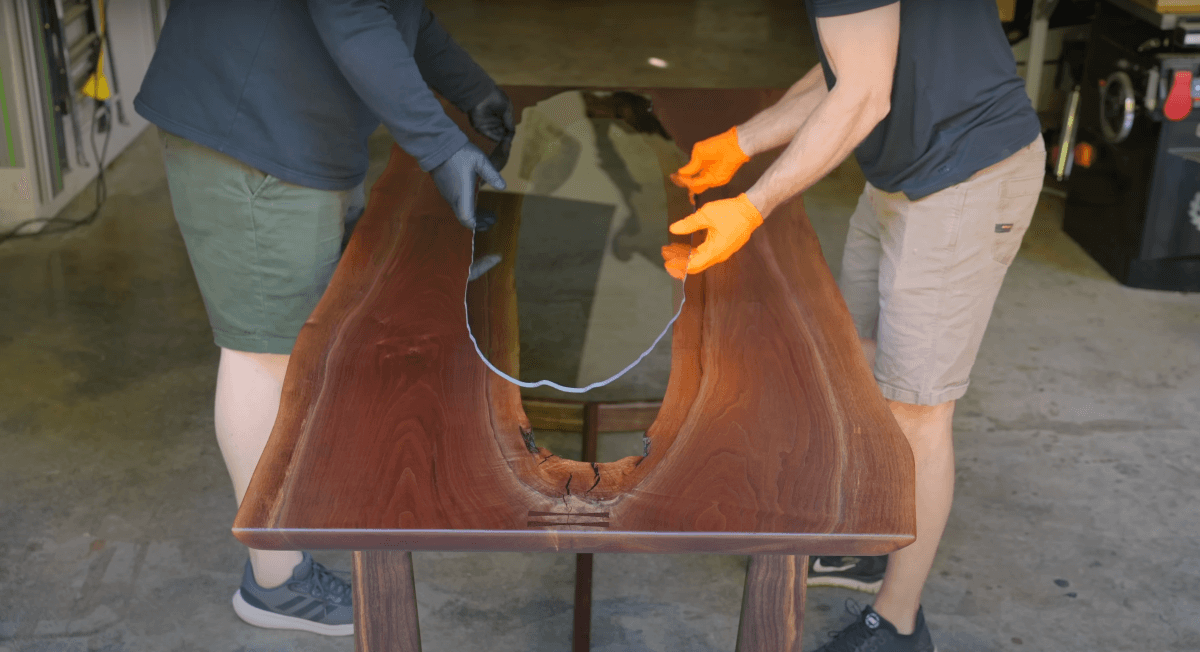
With the base now secured and the finishing all wrapped up (you can watch the full finishing process here), the last thing to do is place in the glass.
Some final thoughts on finishing my first glass table…
First off, with only one glass table under my belt, I am clearly not an expert, but I would say that a glass table is probably not the most “beginner friendly” type of project to tackle. I do think if you're going to try a “more complex” table, I would try an epoxy table first.
Also, I cheated. I used a waterjet to cut the glass, so I don't even know if that counts as actually building a glass table.
That said, I think the functionality of an epoxy table is much better. I simply don't love having that ring around the outside of the glass; it feels like a trap for crumbs and liquids… also, as my friend Jerry Rig Everything says “glass is glass, and glass breaks.”
At the end of the day, it's going to come down to your own personal style and preference.
That being said, I think an epoxy table is probably a little better, a little more beginner friendly, but the WOW FACTOR …. hmmmm - that might just go to the glass table!